Having data is one thing. Accessing them is another. But understanding and analyzing them is very different. And visualize them? Perhaps this is one of the most sought-after skills. But how can we go from having data to understanding, analyzing and visualizing it, knowing that there is a tight budget? There are many visualization tools on the market. From my point of view, Google Data Studio is a very good option, since it is completely free and accessible to everyone (even if you don’t have your own data!).
In this post I will guide you through the most useful tools of Data Studio. We will start with the basics before moving on to intermediate functions. Finally, we will review the advanced options.
Like most Google tools, Data Studio can be difficult to master, but it is well worth the effort. Once you are comfortable with its functions, you can use it to create reports for your clients, your colleagues or your management team.
Access Data Studio at
datastudio.google.com
1. Log in to Data Studio
To log in, you will need a Google account; I recommend that you use the same one as your Analytics, Search Console and/or Google Ads account.
You will arrive at the Data Studio summary page. Click on the “Home” tab to view your control panel.
2. Explore the Data Studio control panel
If you have already used Google Docs, Sheets or Drive, this panel should be quite familiar to you.
Reports
This is where you can access all your reports (equivalent to a workbook in Tableau or Excel).
There is an option with which you can filter the owner of the report:
Sources of data
Data sources list all the connections you have created between Data Studio and your original data sources.
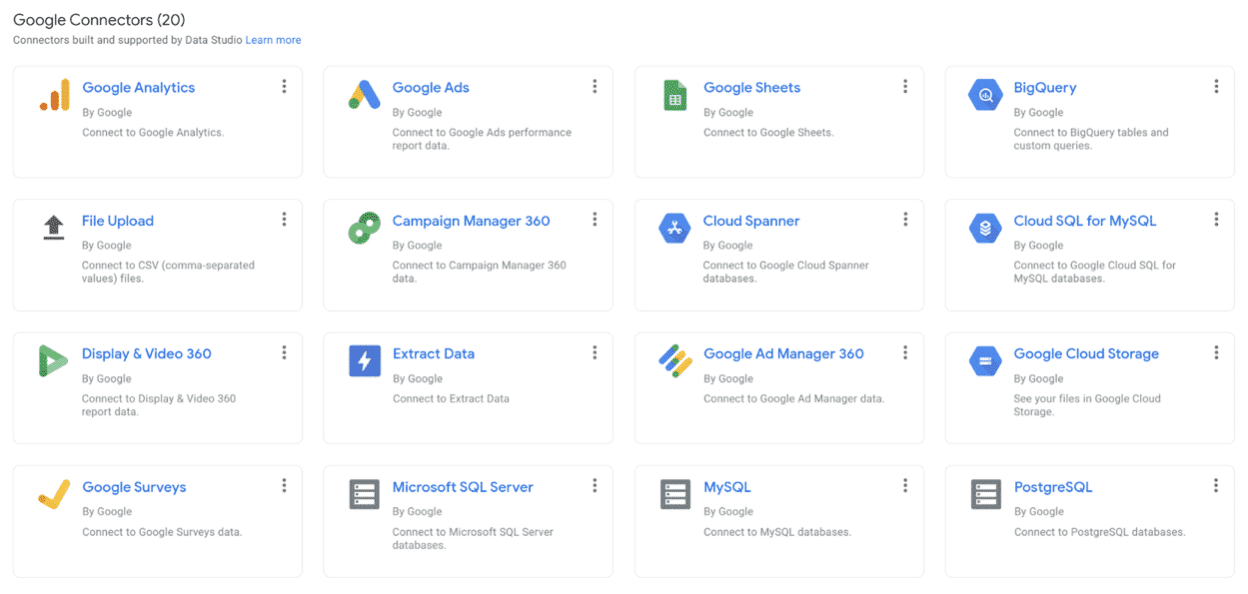
Data Studio currently supports more than 500 data sources.
Google Data Studio data sources
The most popular sources are:
- Google Analytics
- Youtube
- Google Ads
- Google Search Console
- BigQuery
- YouTube analysis
- PostgreSQL
- 360° ad search
- 360° screen and video
If you use Google Analytics and/or Search Console (which I highly recommend), you will need to individually connect each view and property, respectively.
Therefore, if you have three GA views for three different subdomains, you will have to configure three different data sources.
Don’t worry; it’s an easy process.
3. Explorer
Explorer is a tool that allows you to experiment or adjust a chart without modifying the report itself.
For example, you have created a table in Data Studio that shows the top landing pages by conversion rate. As you look at this table, you think to yourself, “I wonder what I would find if I added the average page load time.”
Since you do not want to edit the graph in the report, you export it to Labs, where you can modify it as you wish. If you decide that the new chart is valuable, it is easy to export it back to the report.
4. Product Description
Takes you back to the Overview tab. I don’t know why it’s here; I never click on it.
5. Gallery of reports
This is a collection of templates and examples. I will comment more about the gallery below.
6. Connecting to data
This is where data sources are added (Sources can also be added within a report). Let’s add our first one:
I recommend starting with Analytics or Search Console.
In this example, I will connect Analytics; however, the process is almost identical for other sources.
If you want to follow exactly what I’m doing, connect the Google Analytics demo account for the Google Product Store. It will ask you to authorize the connection and, once this is done, you will have to select an account, a property and a view. To finalize the connection, you have to click on “Connect” (top left).
Leave the “Edit fields in reports” option set to “On”. If you are creating a report, for example, for a client or an intern, and you want to give them editing permissions without giving up full control of your data, you can disable this option.
Click here to learn more about field editing.
.
In this menu you will see a list of all the fields in your Analytics account (both standard and those you have added).
Feeling overwhelmed? No worries. There are many things we could do in this step – add new fields, duplicate existing ones, disable them, change field values, etc. – but we can also do all these things in the report itself, and it’s much easier.
So let’s move on quickly. Click on “Create report” at the top right.
Data Studio will ask you if you want to add a new data source to the report; yes, you do.
Here’s what you’ll see. It’s pretty spartan, but not for long!
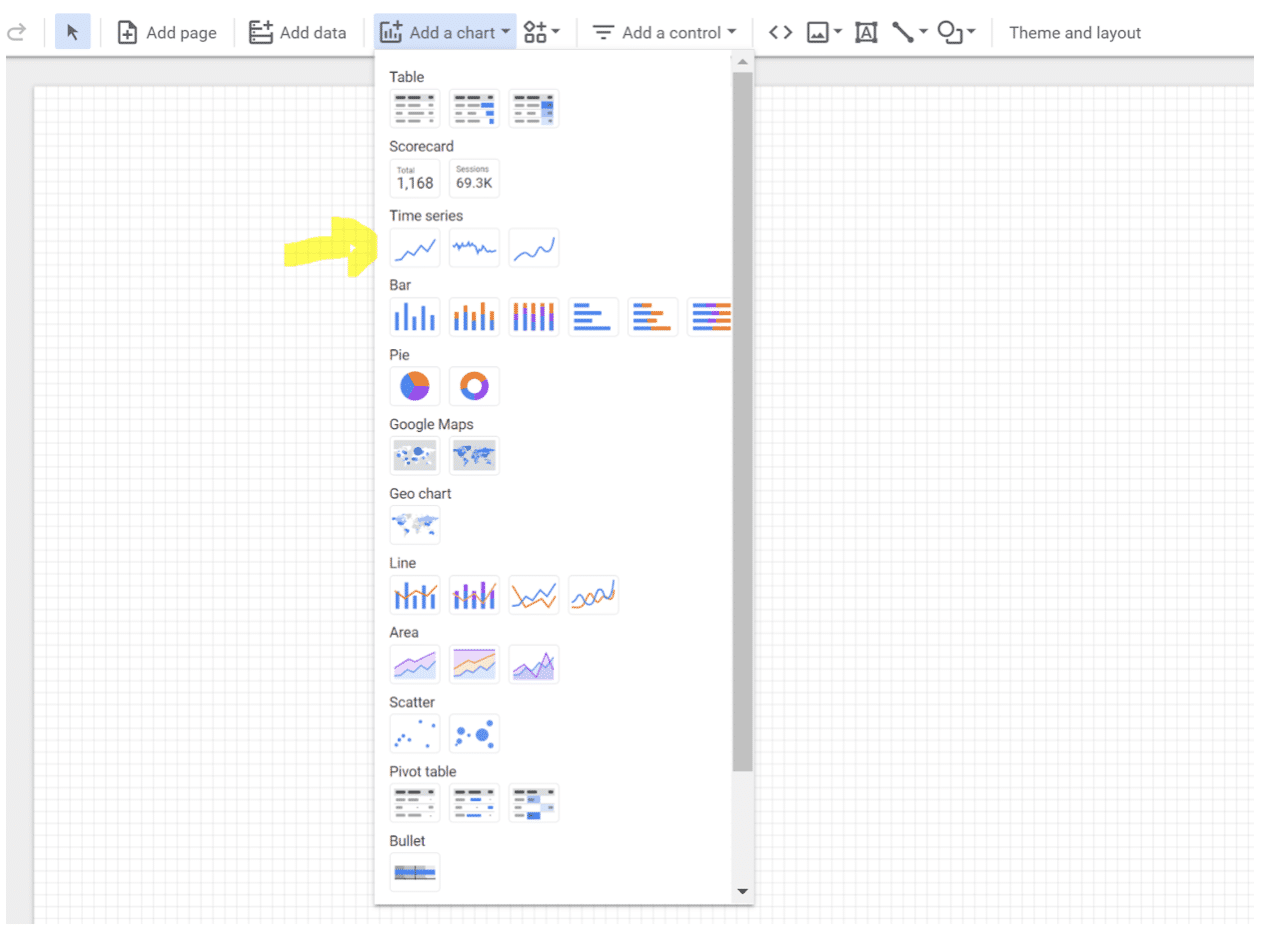
Click on “add a chart” in the toolbar. Data Studio facilitates the comparison of chart types with practical illustrations.
Choose the first option under “Time Series”. This type of graph shows changes over time.
Once it appears in your report, the right pane will change. Here’s what you should see:
By default, the dimension is “Date”; you can change it to any of the time-based dimensions, including “Year” or “Time”, among others.
In this case, I will opt for “Date”.
Data Studio will automatically select a metric (i.e., what is displayed on the Y-axis) for you. Change whatever you want; for example, I have “New Users” selected by default, but I prefer to see “Goal completions”, which are leads.
Make sure you have selected the graph to see the panel on the right:
You have two options for adding a metric (or dimension): you can click on the blue plus icon – which will bring up a search box so you can find the field you want – or you can drag a field from the right into the metrics section.
To remove a metric, simply hover the mouse over it and click on the white “X” that appears.
Now let’s add a table. This time choose the third option:
My chart defaults to Medium (for dimension) and New users (for metrics) so I change it to Country and Goal completions. I think the format of this table could be improved. Change the “Rows per page” from 100 to 20 (much easier to read) and check the box to add a Summary row.
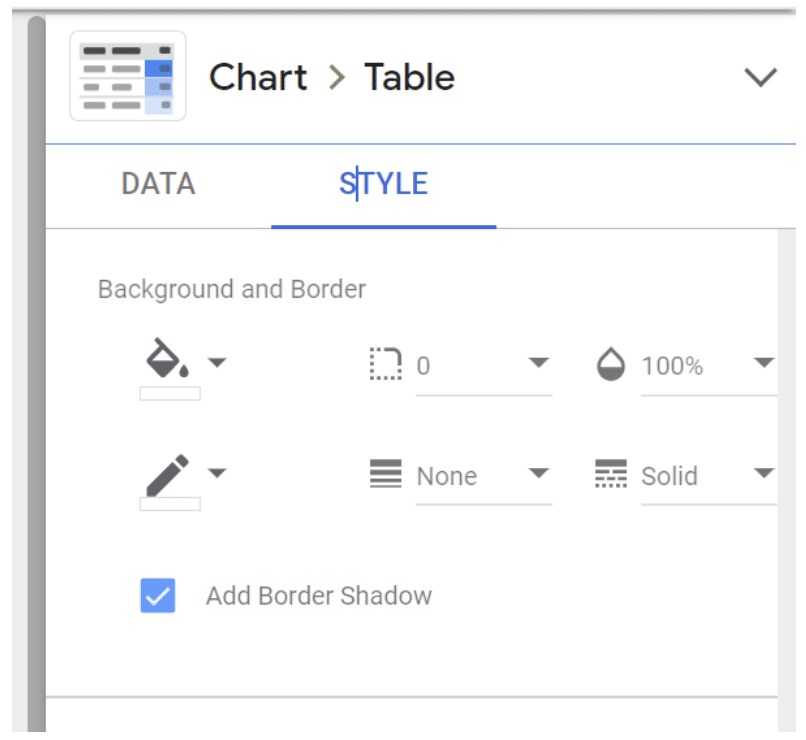
Finally, click on “Style” to go to the style tab. Select “Add shadow on border”. This is one of my favorite ways to make a data viz stand out from the page.
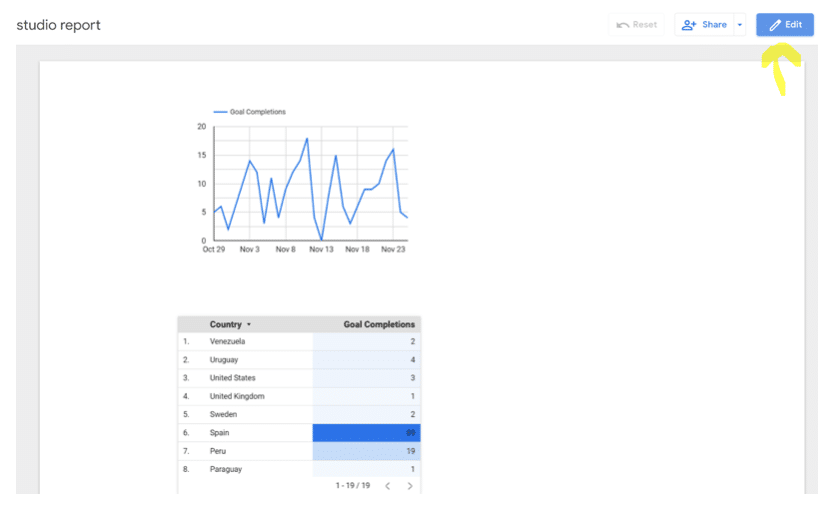
To view click on “View” in the upper corner. This will switch you from Editor mode to Viewer mode.
Voilà!
Finally, we need to name the report. Click on “Edit” and double-click on the title (right now it is “Untitled Report”) to change it.
And with that, the first report is officially done. To share your report, click on the familiar icon above the Graph Editor and add the e-mail addresses.
Okay, don’t share the report yet, because I’m about to reveal the secrets that will help you seriously improve it.
Tips for beginners
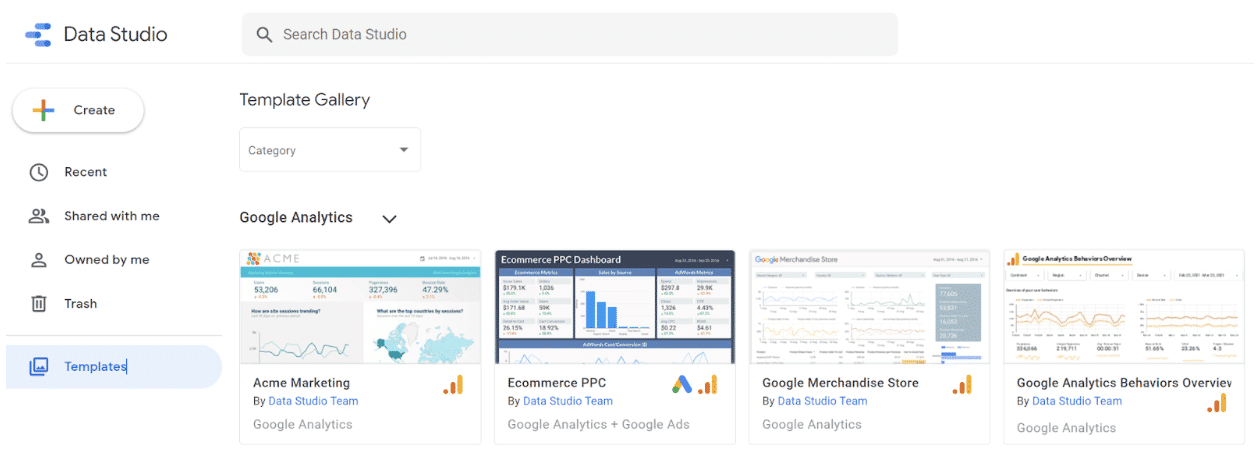
1. Use templates
There is no need to reinvent the wheel. If you are not sure where to start with Data Studio, I recommend that you check out
take a look at their templates
for inspiration.
Pay attention to the creator of the report. Many templates have already been created by the Data Studio team; you can find them all in the “Marketing Templates” section. But there are also more than 45 user submissions, located in the “Community” section. Some of my favorite templates:
- GA behavioral overview: This dashboard extracts the most relevant information from the behavioral section of Google Analytics.
- Paid Channel Mix Report: Use this template to understand the performance of your ads on Facebook, Twitter, LinkedIn, search, etc.
- Technical website performance indicators: Get a quick overview of your website’s real-time performance, including JavaScript and 404 errors and page load times.
2. Publish your report
Want to show off your data analysis and visualization skills to the world? Send your report to this gallery by
this Google form
.
Read the
instructions at this link
but these are the points I would keep in mind:
- Do not share sensitive information. I recommend that you create a report with publicly accessible data so that there is no chance of you getting in trouble for sharing data that does not belong to you. (Pro tip: recreate one of your existing company reports with dummy data from one of Google’s sample data sets).
- Make it impressive. The public reports are impressive, so don’t hold back on design, features, etc.
- Add context. Provide explanations on the page about what you are measuring or monitoring with captions, instructions and even a video showing the report.
3. Connect with more than 150 sources
As I mentioned, you can enter data from Google’s own sources in Data Studio, such as Search Console, Google Ads, YouTube and Campaign Manager.
But that’s just the tip of the iceberg. There are also more than 120 partner connectors, i.e. third-party bridges between Data Studio and platforms such as Adobe Analytics, AdRoll, Asana, Amazon Ads and AdStage (and that’s just the Ace).
Consult
all options here
.
4. Create your own report theme
Whether the report is addressed to internal stakeholders, external stakeholders, the management team or customers, it will be more effective if it looks good.
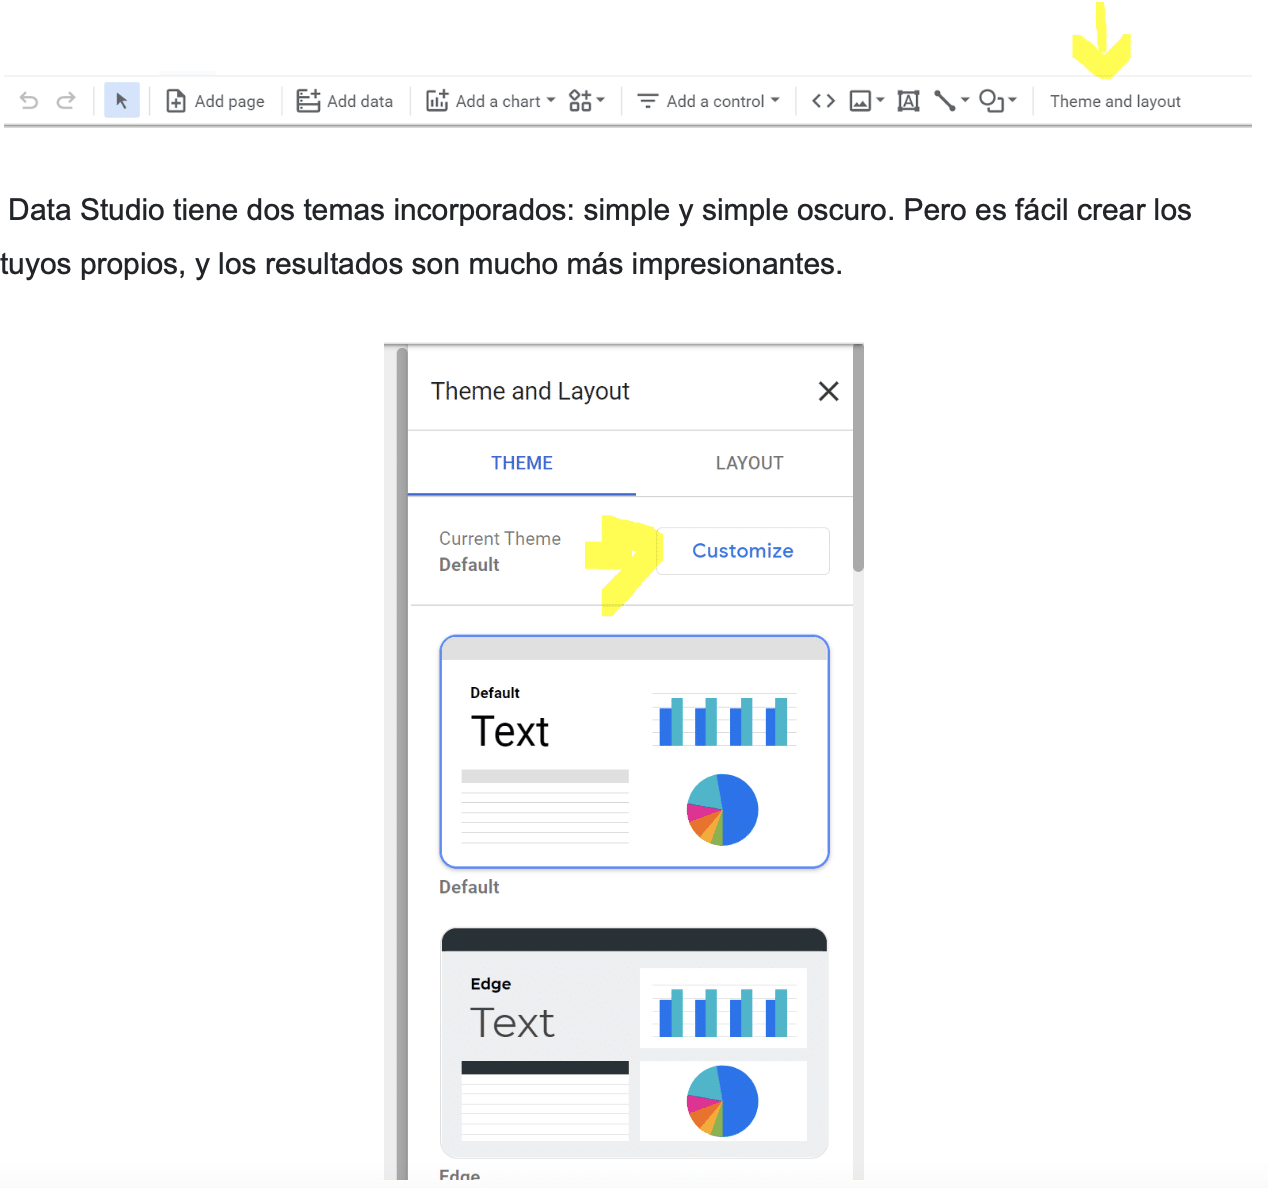
To adjust the style and format of the report, click on the Layout and theme option in the toolbar.
Any changes here will be applied to the entire report, which means that you only have to choose fonts, colors, etc. once, instead of every time you add a new module to the report.
Change the “Current Theme” drop-down to “Custom”. Use your brand’s style guide to choose primary and secondary colors, fonts and text color. You may need to be creative in this regard. If you are creating a report for a customer and you do not know their hex codes, go to the customer’s website and identify the colors.
In this tab, you can also create a custom graphics palette and edit the border and background settings.
5. Incorporation of external content
You can incorporate external data as well as share your own.
With the URL embedding feature, you can embed Google Docs, Google Sheets, YouTube videos and even live web pages. The embedded content is interactive, so it is much more powerful than a screenshot.
To add content, click on “Insert” in the top navigation bar and then choose “Insert URL”.
From there, simply paste the URL. You may need to resize the box that appears to fit the full length and width of your content.
The options here are quite endless. One of my favorite ways to use this feature is to embed a Google Form to measure the usefulness of the report for my audience.
- If a section of the report needs additional context, I will add a short video explaining what they are seeing and how to interpret the results.
- To customize a report for a client, I will add the URL of their website, blog and/or any pages they have hired me to create or improve.
- And for the HubSpot blogging team, I’ll add the latest version of the Search Insights report so they can compare our progress with the results.
6. Send scheduled reports
If you have a group of stakeholders who need to see your report on a recurring basis, consider using Data Studio’s “scheduled report” feature. Click on “Share” and then click on the clock in the top menu to configure it.
First, enter the e-mail addresses of your recipients and then choose a schedule: daily, every Monday or every month.
This is especially useful when working with clients, as you may not want to give them access to the live report.
7. Report download
You can also download your report in PDF format. This is useful for one-off situations, such as if your boss asks for a status report or your client wants to know how an ad has performed so far this month.
To download the file, click on the down arrow next to the clock.
Data Studio offers the option of downloading the current page or the complete report. You can even add a link to the report so your audience can drill down if they wish and add password protection to ensure the security of your data.
8. Embed reports
You can even display your report on your company’s website or in your personal portfolio, which can be a great way to highlight the results you’ve achieved for a client or project.
Click on the square brackets icon in the top navigation bar.
This box will appear:
Adjust the width and height as needed.
Data Studio Intermediate Tips
9. Add a date range
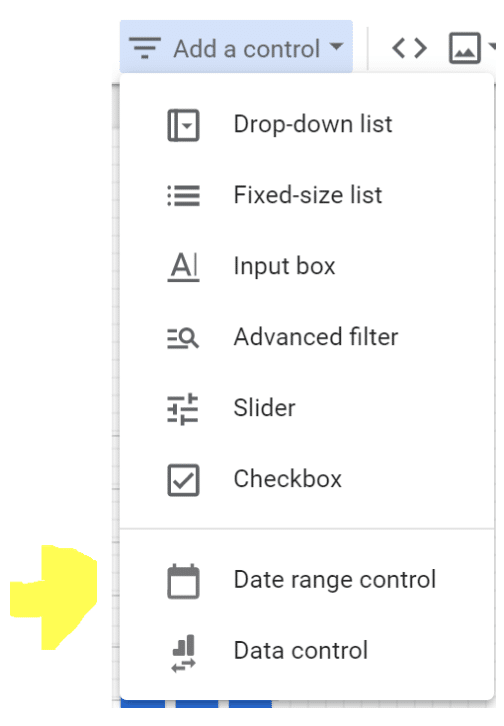
Allow your users or customers to select the dates on which they want to view the information. For example, my reports always default to the last 30 days. You can change as you wish, such as “yesterday”, “last 7 days”, “this year”… In short, you can choose a customized period. To enable it, first navigate to the page where you want to give users control of the date. Make sure you are in “Edit” mode. Then click on the calendar icon in the toolbar.
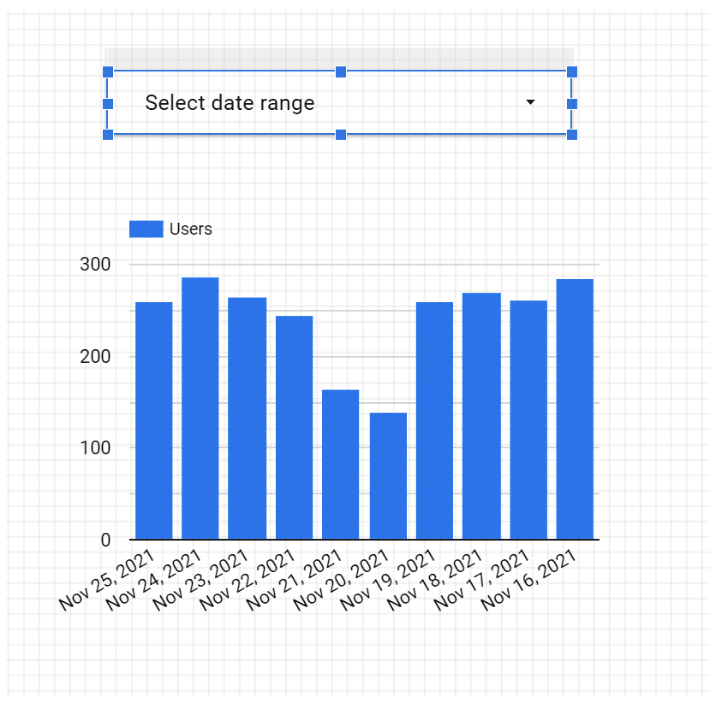
A box will appear in your report. Drag it to the position you want – best somewhere in the top right or left corner so your audience will see it first – and adjust the size if necessary.
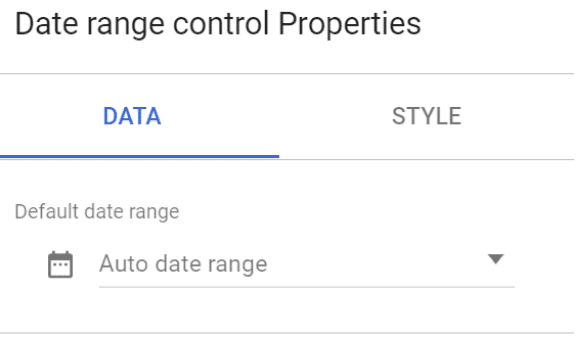
Clicking on this module will bring up a panel on the left side of your report called Date Range Properties. Set the default date range to “Automatic date range”, if it is not already set.
The user will be able to select a date range by using the
widget
widget, and all reports on the page will be automatically updated to that time period.
There are two ways to cancel it:
- Sets a time period within a specific chart. That time period will always override the date range control.
- Group the charts you want to be affected by the date range control with the module. Select the graphic(s) as well as the chart, then choose Arrange > Group.
From now on, only the charts in this group will be updated when someone adjusts the date range.
Make sure this setting is clear and easy to understand, otherwise they will probably assume that all the graphics they are viewing on your current page are using the same time period.
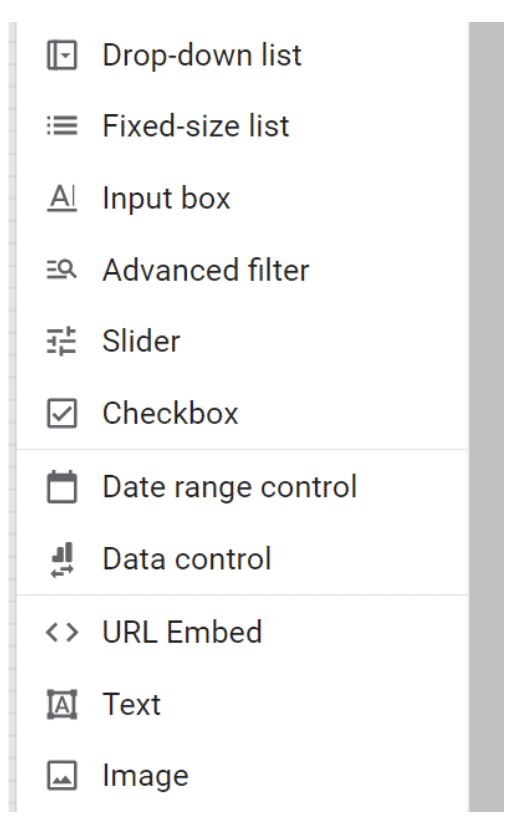
10. Add filter controls
Give your users even more flexibility with filter controls. Like the date range control, a filter applies its settings to all reports on the page. For example, if someone filters out everything other than organic traffic, all reports for that page would show organic traffic data specifically.
Add a filter control by clicking on this icon in the toolbar:
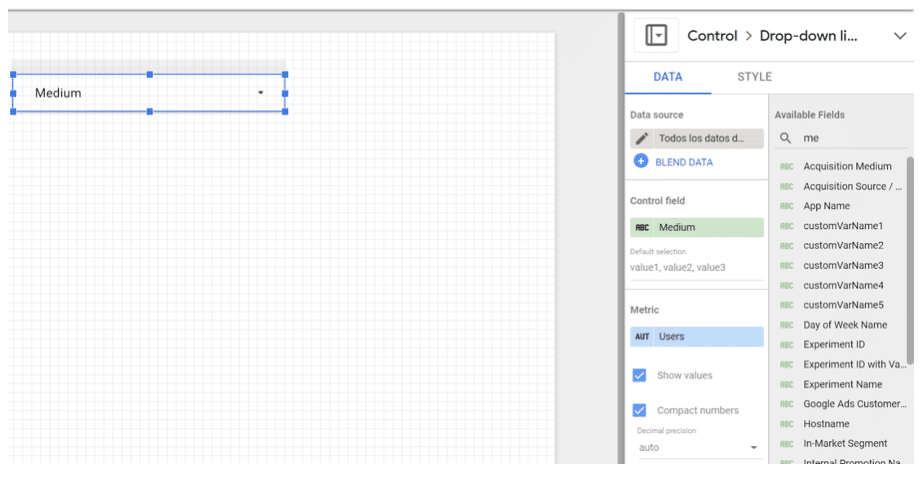
The filter will appear on the report page. Change its size and drag it to the desired position. While it is selected, you should see a panel on the left side:
In the data tab, choose the dimension you want users to filter on. These dimensions come from your data source (in this example I have chosen “Medium”).
The metric part is optional. Basically, if checked, users will see the values of each dimension subcategory in the filter (this will make more sense once you see the screenshot below). You can sort by these values, but you cannot filter by a metric.
You can add an additional filter to its filter control. For example, if you have added a filter for Source / Medium, you may want to exclude the “baidu /organic” so that your users do not see it as an option.
Customize the format and appearance of your filter control in the style tab. You have a few options: list/check all that apply filters, like this one:
Or the “search all” filters, which allow your users to search by numeric and text terms using operators such as >=, and <, or “equals to”, “contains”, etc., respectively.
This can be a nuisance for people reading the report; in addition, they have to be somewhat comfortable with the search operators. Unless your filter dimensions have 10,000 values (unlikely), stick with the list filter.
11. Create interactive graphic filters
Do you want to make it even easier for your audience to filter the graphs in your report? Creates responsive graph filters.
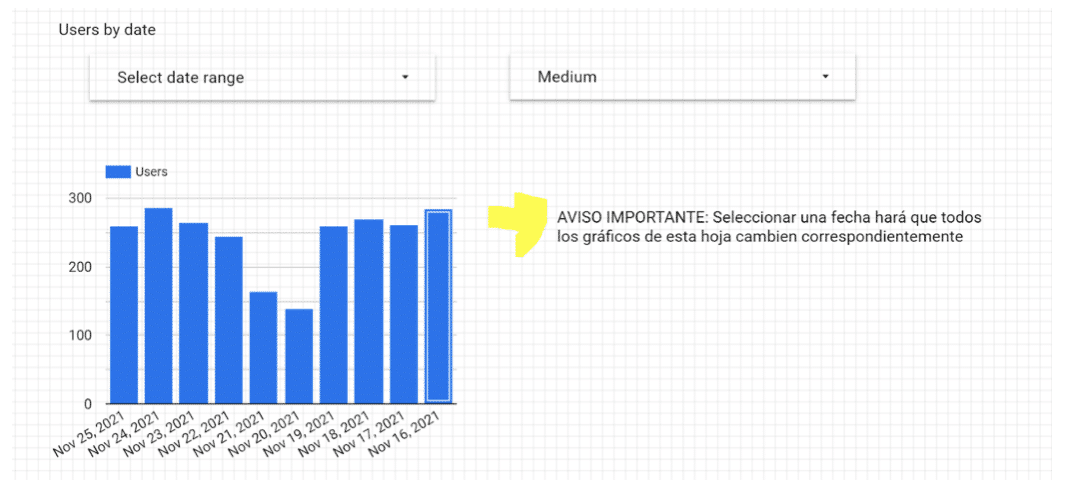
It sounds very fancy, but it simply means that selecting a dimension in a chart filters out all charts on that page for that dimension.
For example, if you click “organic” on this chart, the other charts on the page will update to show organic traffic data only, as if you had applied a traditional filter control.
You can also create chart controls for time, line and area charts. If a user highlights, for example, the months January through March on a time chart, the other charts on the page will also show the January through March data, as will the date range control. And also, like the filter controls, you can group the graph controls.
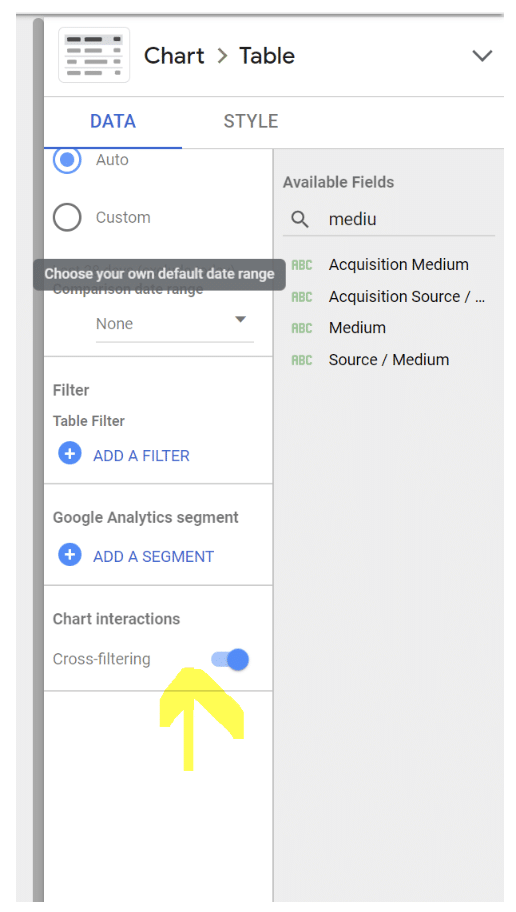
To activate a chart control, select the corresponding chart. In the right pane, scroll to the bottom and check the “Apply filter” box.
Add a legend next to graphics that support interactive filtering to let users know it is an option:
12. Add data control
Data controls can be one of the best features of Data Studio. If you place one of these controls in your report, users will be able to choose the source of the data entered in the charts.
Pretty nifty, isn’t it?
Not only does this save you from having to reconstruct the same report for different groups, but it also means you don’t have to worry about accidentally sharing sensitive or confidential information. Each user can select only the data sources to which he/she has been granted access.
You can include several data controls in the same report.
Add the
widget
widget to your report by clicking on this icon:
Next, choose the primary source you want users to feed from:
13. Add a breakdown of dimensions
Instead of explaining what a dimension breakdown is, it is easier if I show you.
Suppose we want to see the users by source. To find out, we create a simple bar chart.
This is interesting, but some context is missing. Is all this organic traffic coming from Google? (In this case, where the data is from the United States, it’s pretty obvious, but imagine creating the same chart for China or Japan, where Baidu and Yahoo have a much larger presence.)
What about referral traffic? It is clear that we receive a significant number of users through referral links; is a single source driving most of them or is it fairly evenly distributed across a wide variety of sources?
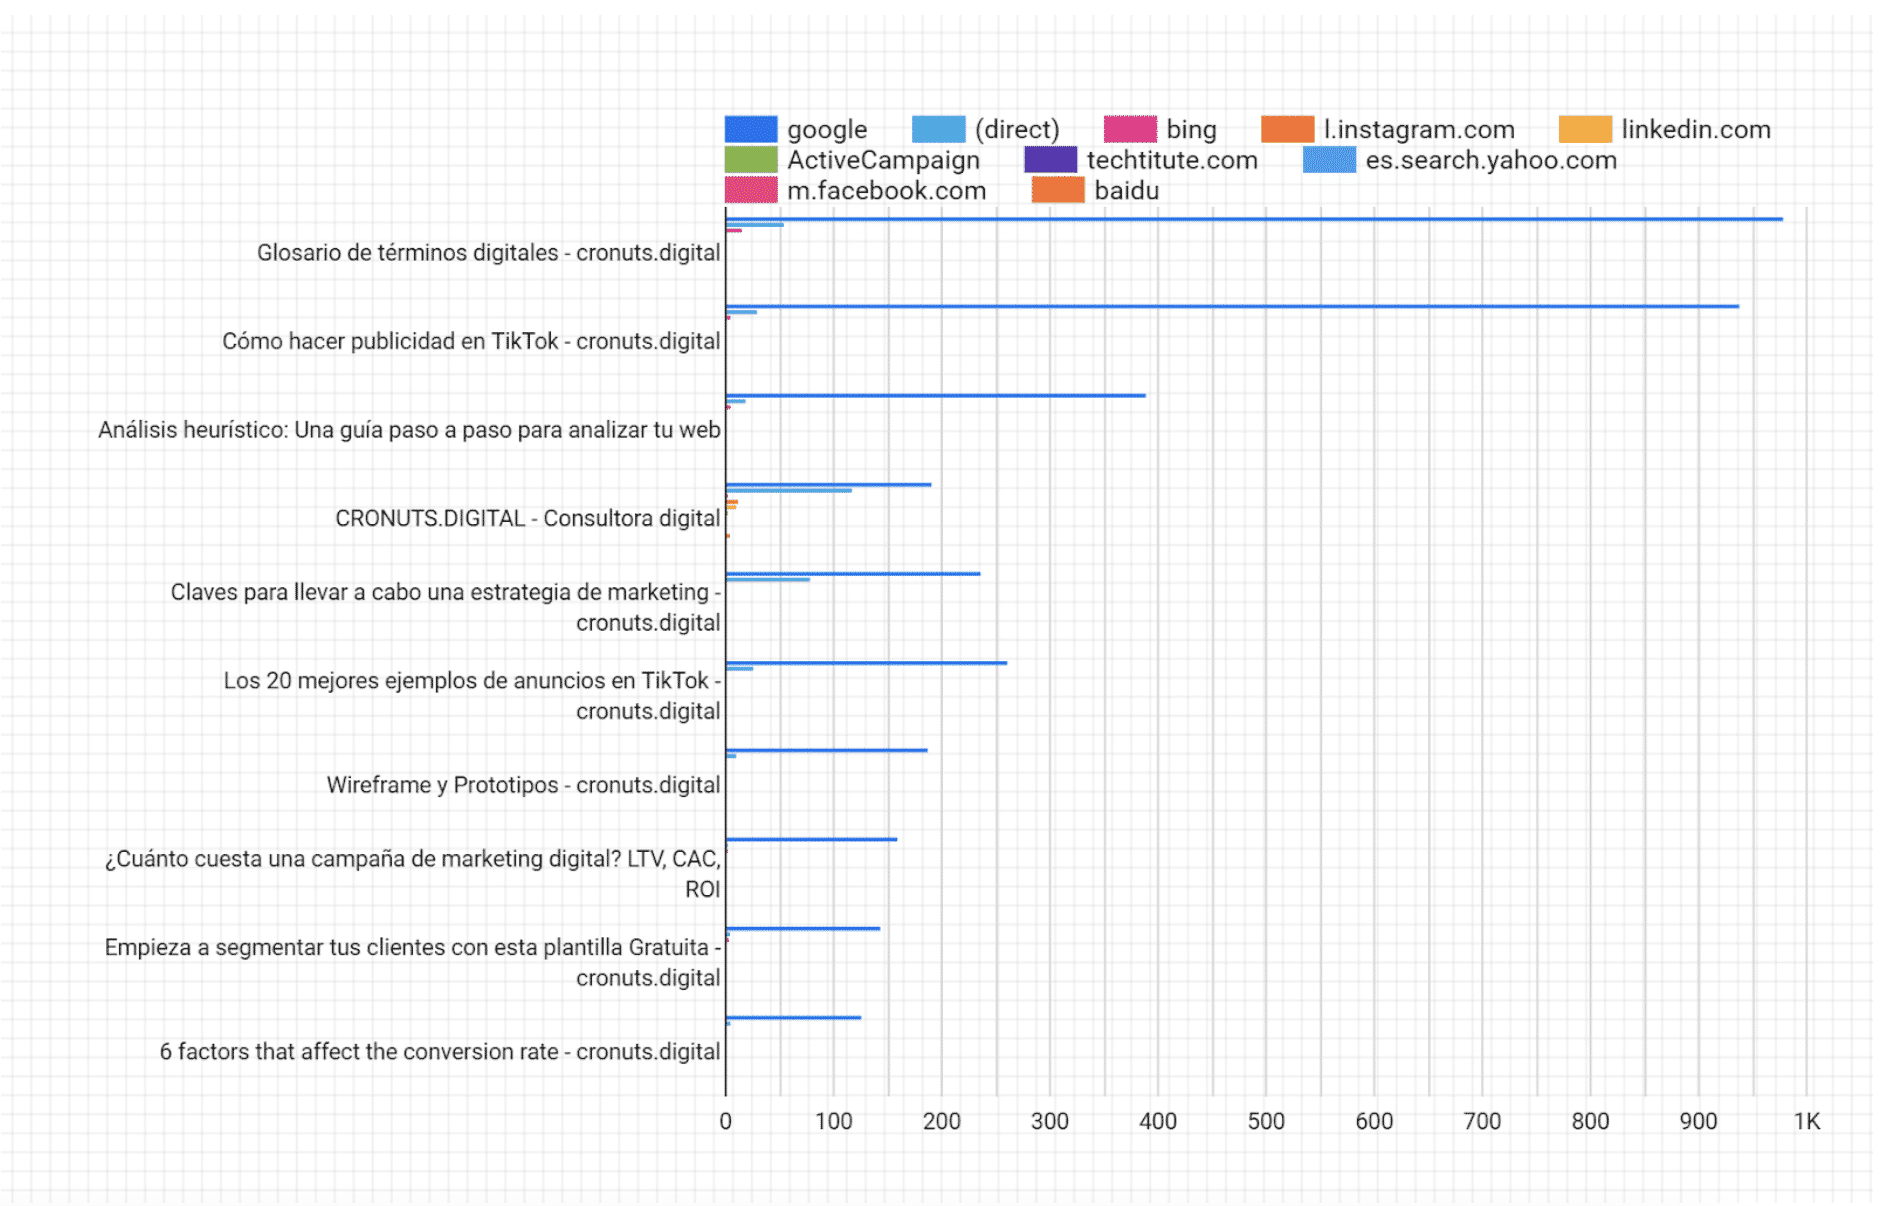
We could create separate bar charts for each source, first filtering by medium and then doing the “Source” dimension and the “Users” metric. Or we can click a single button and have Data Studio do it for us:
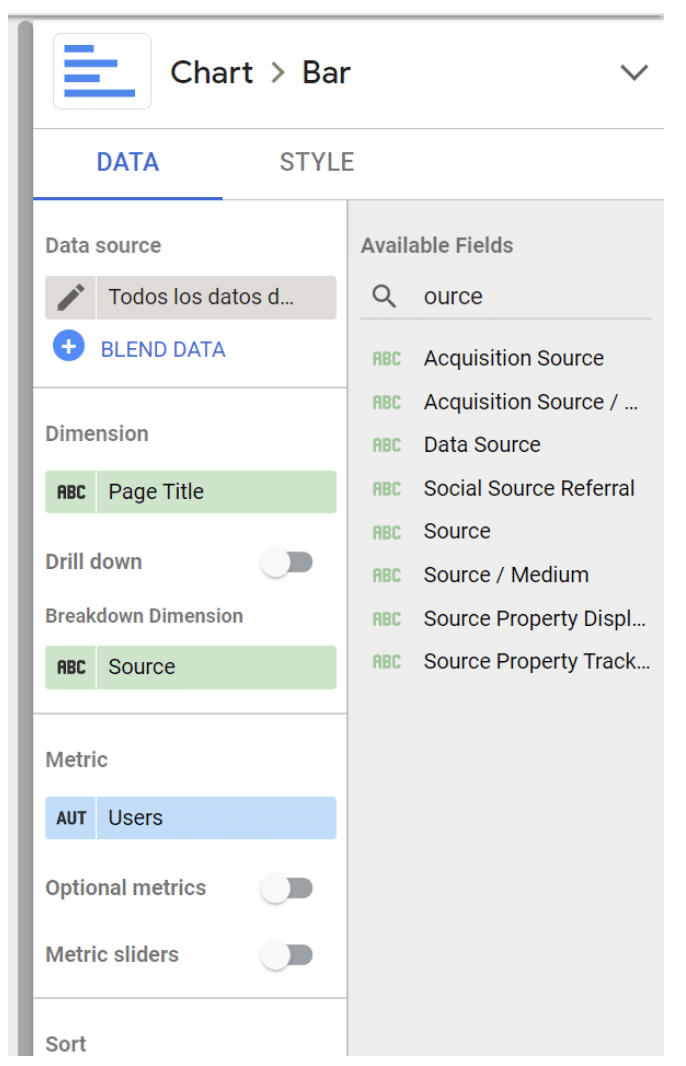
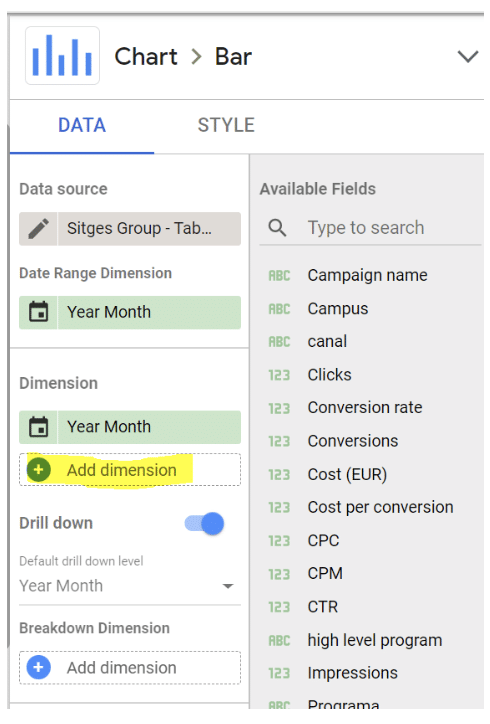
Under Breakdown dimension, click on “Add dimension”.
Add “Source”. Here’s what you should see:
Go to the “Style” tab and check the “Stacked bars” box. This will convert your normal bar chart to a stacked bar chart (you should see the chart type update accordingly).
Data Studio will automatically make your bar charts 100% stacked, which means that each bar will go to the top of the chart. This style is deceptive. For example, here it suggests that each medium drove the same number of users. Uncheck this box:
Check it out:
14. Using the Data Studio Explorer (Labs)
Go to your
Data Studio control panel
and select “Explorer (Labs)” from the left menu.
Add a new data source by clicking on the blue button in the lower right corner. At first, Explorer is confusing. It is very similar to the core of Data Studio. However, after spending some time in the Explorer, I have come to appreciate its unique value.
Unlike Data Studio, any modifications you make to a chart in Explorer are temporary. This means that it is a good place to dig into the data and try different ways of visualizing it without making any permanent changes. Once you are satisfied with your chart, just export it back to Data Studio.
To do this, click on the small share icon in the top navigation bar.
Next, choose whether you want to add your work in the Explorer to a new or existing Data Studio report.
Advanced features of Data Studio
15. Create filters at report level
By default, a filter is applied to all graphics on that page. But what happens if the user moves on to the next page? The filter will not be applied.
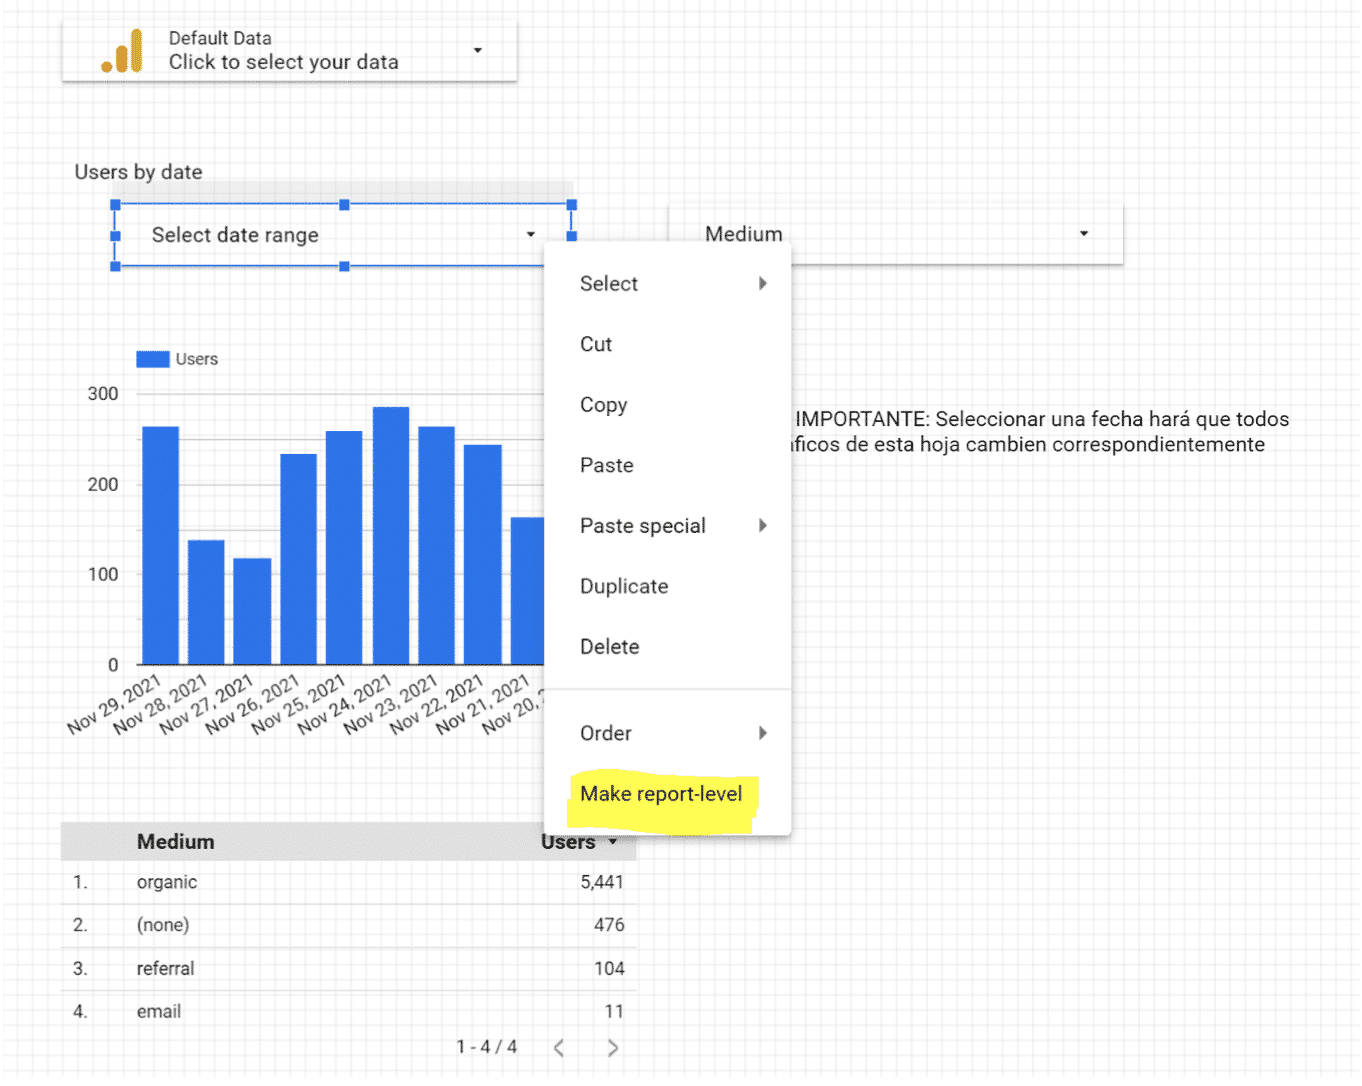
This is confusing for non-technical people and inconvenient for the data literate. To take a filter from the page level to the report level, simply right-click and select “Make report level”.
16. Create combined fields
Data Studio is powerful because it can incorporate more than 400 data sources into a single report. Thanks to a new feature, the combined sources, just became even more powerful. Attention: it may be a bit technical. Stay with me and I promise it will be worth it.
If you are familiar with JOIN clauses in SQL, you will quickly understand the mixing of data. Don’t know what SQL is? No problem.
The best way to think about the mix of data is with a Venn diagram. You have two sets of data. Each data set has unique information, e.g., data living in the green and blue areas, respectively.
But they have (at least) one thing in common: the information in the blue-green overlap section.
This shared data point is known as a key. If your datasets do not have a key, they are not mixable.
For example, suppose you want to compare the behavior of users on your website with that of your application. The key is the user ID, a custom dimension that Google Analytics has created and that your app analytics software also uses.
Combines the GA website behavior report with the application usage report. This gives you all the records from the first report along with matching records from the second; in other words, if a user has visited the site and used the application, they will be included. If you have only used the application but have not visited the site, it will not be included in the new combined data.
This is known as a LEFT OUTER JOIN. Why should you be interested? Because the order of your data sources is important.
Put your primary data source first, i.e. the one where you want all the values, regardless of whether there is a match in its second source.
Now that we’ve got all that out of the way, let’s set up a mixed field.
First, add a graph to your report:
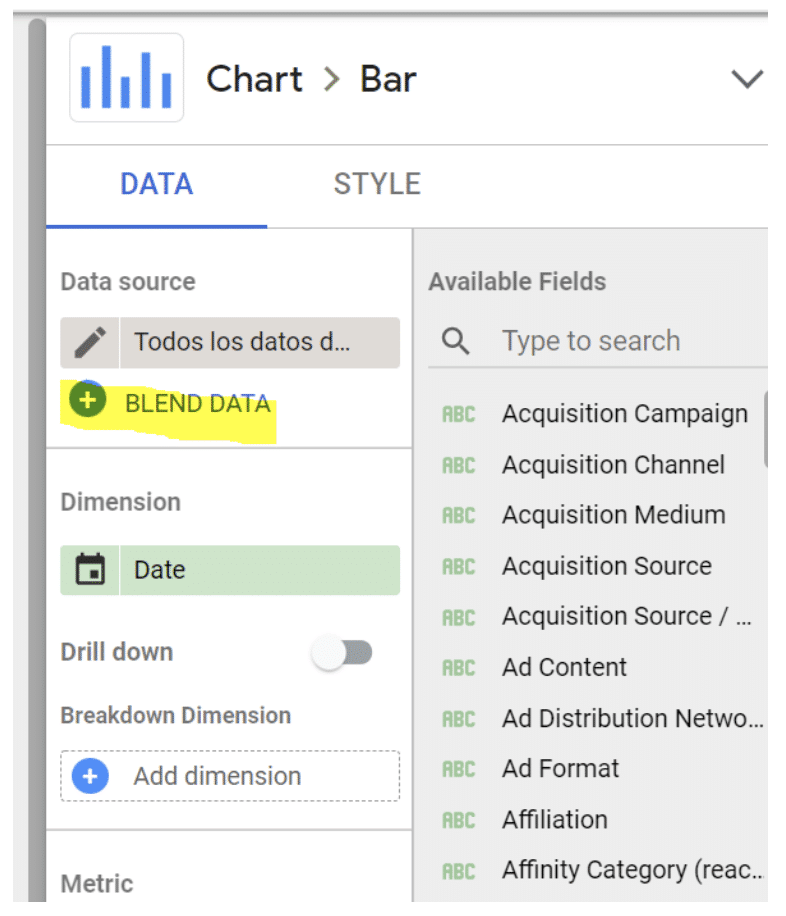
Click on “Merge data”. This panel will appear:
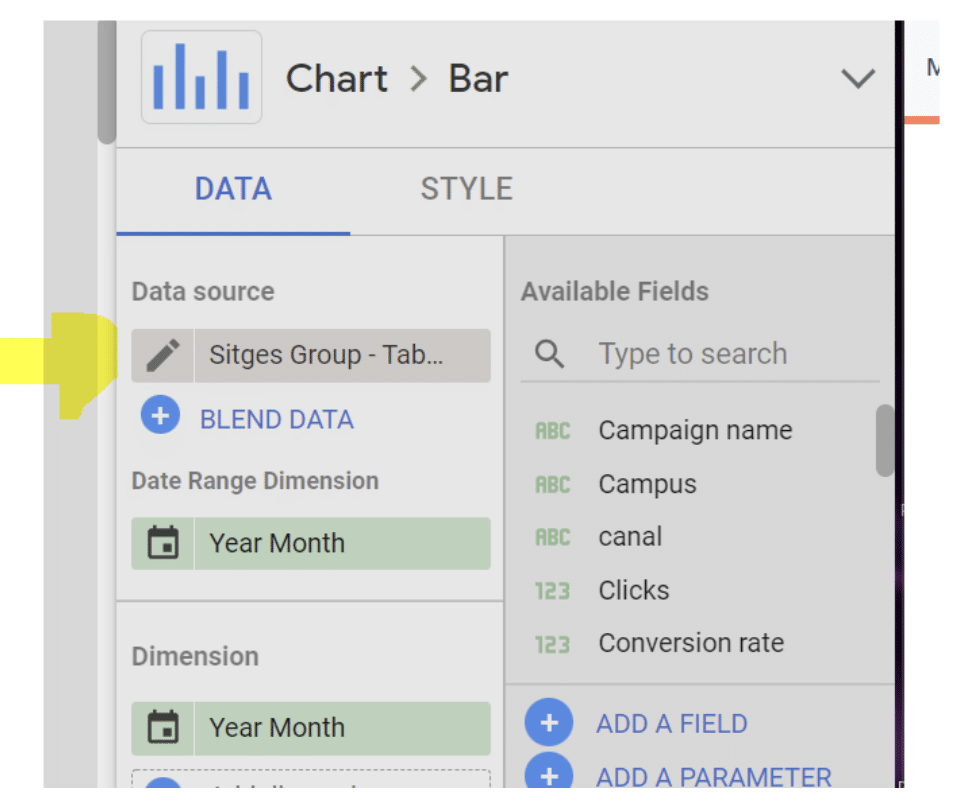
Select your first data source on the left. Remember that this is the main source of data. Next, add your second data source. Data Studio allows you to add up to five data sources in a chart, but for now, let’s limit ourselves to two.
Now choose your binding key(s). If the field exists in both sources, it will turn green. If it does not exist, you will see this:
Remember that the key acts as a filter for the second data source. In this example, only records that match the GA view landing page for your website will be pulled from Google Search Console.
Choosing multiple keys will further limit the number of records extracted from the second data source.
Once you have chosen your binding key(s), the rest of the process should be familiar:
Choose the dimensions and metrics you want to see for your first data source. Then do the same with the second one.
You can also limit the results by adding a filter or a date range (or, in the case of GA sources, segments). Filters, date ranges and segments applied to the leftmost data source will be carried over to the other data sources.
Once you have finished customizing the report, click “Save”. Congratulations: you have just created your first combined data chart!
Another thing you can do is to create two separate graphs and then combine them, Data Studio offers a great shortcut. Just select both graphs, right-click and choose “Merge data”. Unfortunately, Data Studio can get confused quite easily, so I would make the effort to learn how to blend data using the right pane.
17. Create a basic calculated field
When the existing data does not give you enough information, it is time to create a calculated field.
Calculated fields take your data and, as the name implies, perform calculations on it.
It is probably easier to explain it with an example. Let’s say you want to see the cost per lead. You can create a calculated field that takes the “Cost” metric and divides it by the “leads” metric.
Once this field is created, it will be updated automatically, so you can change the chart time range, dimensions, etc., and the average transaction data per user will be updated accordingly.
There are two ways to create a calculated field:
- Create a field at the data source level, which will make that field available in any report that uses that data source. It will also be available as a filter control or in new calculated fields (such as the start calculated field).
Obviously, this is a good option if you plan to use this custom metric more than once. The only caveat is that you must have editing rights on the original data source. You also cannot use a calculated field from the data source with combined data.
- Create a field at the chart level, which means that you will only be able to use the field for that specific report.
All limitations of the other type are reversed: although you cannot use a calculated field at chart level in another chart, filter control or additional calculated field, you do not need to have editing rights on the original data.
You can also use a chart-specific calculated field for data combination, which we will see in the next step.
Create a calculated data source field
Add a chart to your Data Studio dashboard, then choose the data source from which you want to divert your new field.
Click on “Add a new field” in the lower left corner.
(You can also do this by clicking on the pencil next to the data source and then selecting “Add a field” in the upper right corner of your field menu).
Use the menu on the left to search for the metrics you need; click on one to add it to the formula. If the formula has an error, a red notification will appear below the editor explaining where it went wrong. If your formula works, you will get a green check mark.
Click “Save” to add your new field to the data source. Now you can add this calculated field to any chart as a normal field.
Create a calculated field at chart level
This option is a little easier. Simply click on “Add a field” below the existing dimension(s) and metric(s) you have selected.
Then select “Add a new field”. This panel will appear:
From here, enter the formula for your new field –simply typing in the name of the desired metric will open a menu of options– and click “Apply”.
Your new field will be added to the chart.
An excellent
summary of the calculated sample metrics.
including:
- No bounce rate
- Page views per transaction
- Value per session
Check it out for inspiration.
If you want to get some practice before you start working with your own data, Google offers a handy
sample exercise
.
18. Creation of an advanced calculated field
Well, there is a lot you can do with simple algebraic calculated fields. But there is even more you can do once you enter functions and RegEx.
Don’t panic. Let’s go through them step by step.
If you are comfortable with the functions in Google Sheets and/or Excel, then you already know how to use the functions in Data Studio.
For example, let’s say you specialized in English and have always been annoyed that “Source” in Google Analytics is in lowercase. You can use the UPPER function to transform the font into uppercase.
Simply click on “Add dimension” > “Create new field”.
Then enter the UPPER formula:
As
Google Sheets expert Ben Collins points out
this trick will also standardize any custom naming; for example, if some people on your team used “chat” for a campaign and others used “Chat,” the UPPER feature aggregates both.
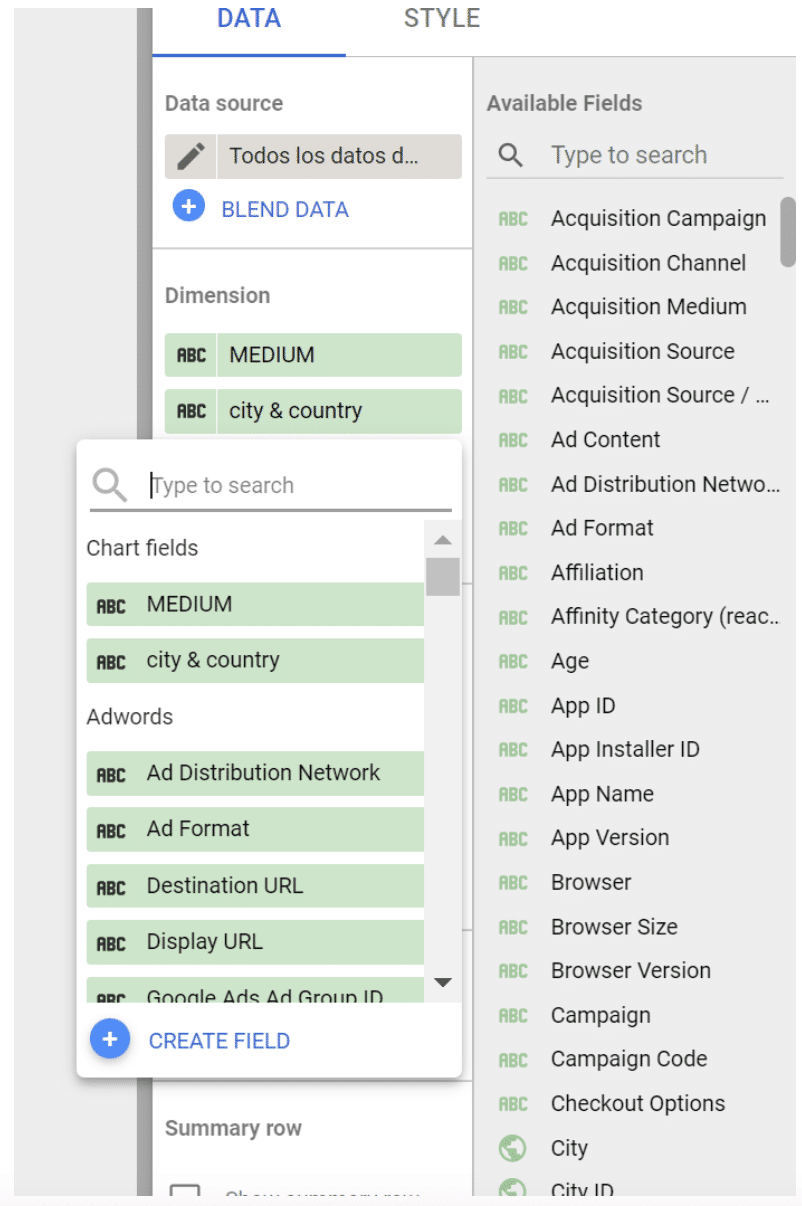
You may want to create a new field for city and country: just click on “Add dimension” (since city and state are categorical variables, not quantitative) > “Create field”.
Then use the CONCATENATE function to join the City and Country fields.
Consult
to the
complete list of features supported by Data Studio
.
One of the most ingenious is CASE; if you are not familiar, it is essentially an IF/THEN statement. This function allows you to create customized groupings.
For example, let’s say you are looking at the table we created in the last step:
Data Studio treats Facebook mobile traffic (m.facebook.com) and desktop traffic (facebook) as two different sources. There is also the desktop traffic l.facebook.com, which arrives through a shim linkwhich Facebook implemented in 2008 to protect users from possible spam. What if you want to combine all Facebook traffic into a single source?
A CASE formula solves this question in a clear way. This is the formula:
CASE
WHEN condition THEN result
WHEN condition THEN result
ELSE result
FIN
You can have one condition (as in the example below) or several. The ELSE argument is optional, so feel free to omit it if you don’t need it.
This is the formula we will use to group Facebook traffic:
CASE
WHEN REGEXP_MATCH(Source,”^(l.facebook.com|m.facebook.com|facebook.com)$”) THEN “Facebook”
END
This formula tells Data Studio: “If the origin coincides with l.facebook.com, m.facebook.com or facebook.com, call it ‘Facebook’.”
To add a CASE formula, you must be able to edit the data source.
Click on the pencil icon next to your source to bring up the data field editor.
Then click on “Add a new field” in the upper right corner.
Enter your formula.
If the formula works, you will see a green check mark. Give a name to your new field and click “Save”. You can now add this field to any chart or data view that uses this data source.
You might be thinking, “Okay, great, but was that formula written in Klingon? How do I come up with my own?”
Ta-da.
Now that you know Data Studio inside and out, you are well prepared to create impressive interactive reports for your co-workers, clients and executives.
Good luck.


